
Hello World Lessons
In this series we'll learn a simple self
contained 'Hello World'... Well learn how to compile it, and run on an
emulator, We'll then learn a more complex example, which includes a
'monitor' function which will show the status of the registers to screen.
 |
Lesson
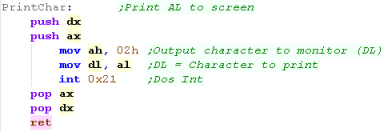
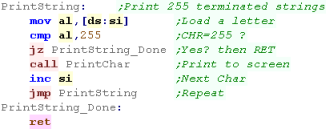
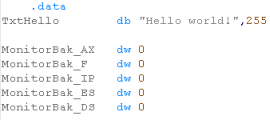
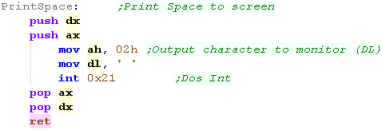
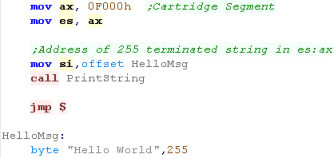
H1 - Hello World on MS Dos In this lesson we'll use to use DOS INTerrupt calls to show characters to the screen and return to DOS, we'll use this to show Hello World. |
 |
 |
 |
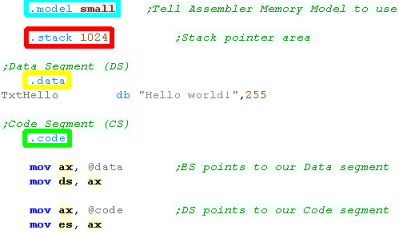
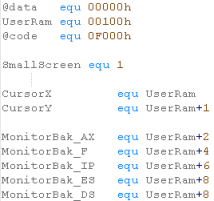
Beginning a DOS program
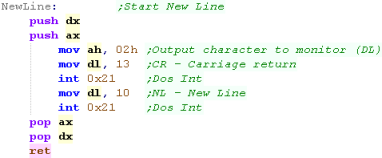
Showing Hello World
Compiling and Running
| these tutorials use UASM
as an assembler, it's free and MASM compatible! We compile it on the command line with the following command:  Defined Symbols... We're defining some symbols on the command line (equivalent of the equ command).. you don't need this for the basic hello world MZ = EXE... MZ tells the assembler we're buiding an EXE file (rather than a COM file) Listing File... we're specify a listing file - it shows the source and resulting bytecode, it's for debugging, so you don't need it, but it helps! Output file... this is the resulting program file Source file... the ASM file we're compiling, in this example %buildFile% will be defined by the batchfile - it would be Hello.asm or something if you're writing your own build script |
|
| The file will be built into a DOS EXE file... Note, this probably won't work on modern windows, so we'll run it with DOS BOX |
 |
| We need to set up the Dosbox config file (dosbox.conf) to autoload our program |  |
| Here is the result | 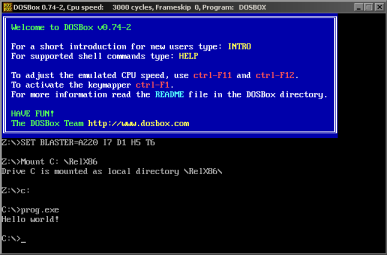 |
 |
COM
Files are limited to 64k in entirety - the .data and .code
segments must all fit in 64k EXE files are more flexible Due to the removal of backwards compatibility, neither will probably work on modern machines - at least if they are 64 bit. |
Extending with a Monitor
| In these tutorials we use some software debugging tools, A Monitor which shows the state of the registers, a Debugger which shows some lines of the memory |
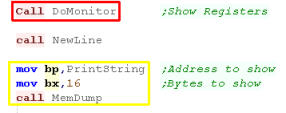 |
| Here is the result | 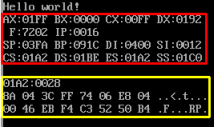 |
Monitor Code
| Writing
your own monitor tools may seem a bit odd, but writing our own
means we don't have to worry about the functionality our
emulator does or does not provide. The Monitor tools are pretty complex, so we're not going to discuss their workings here! |
 |
  |
Lesson
H2 - Hello World on the WonderSwan / Wonderswan Color Let's take our 8086 on the road with some portable programming!... In this episode we'll take a look at the 186 based WonderSwan! |
 |
 |
 |
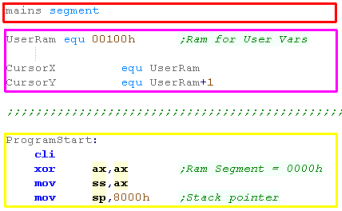
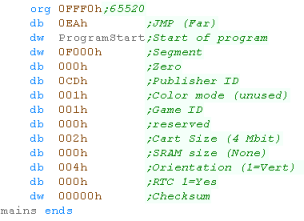
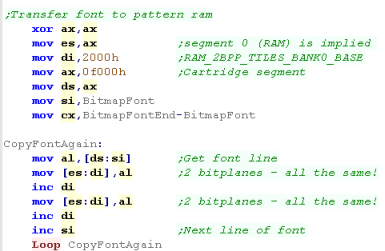
Beginning a Wonderswan program
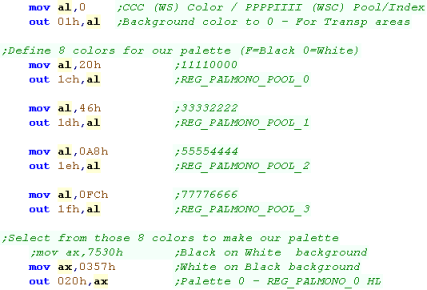
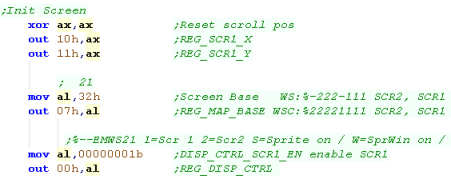
Setting up the Wonderswan Color screen
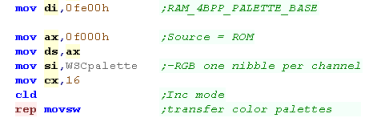
| Most
of the program is the same on both systems, but the screen
setup varies depending on which system you're interested in. |
 |
Setting up the Wonderswan B/W
screen
 |
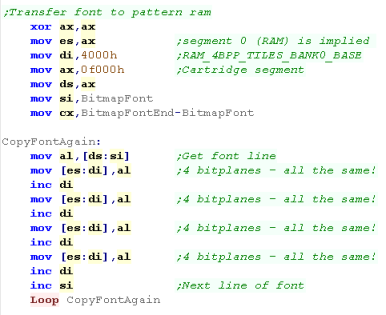
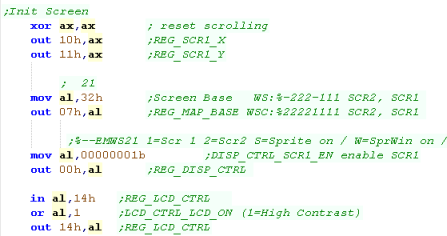
The
WonderSwan Color setup routine is almost the same... Lets
check it out |
Setting up the Wonderswan Color screen
| We're done on the platform
specific code! The rest of our code will work on either the Wonderswan or Wonderswan color, awesome eh? |
 |
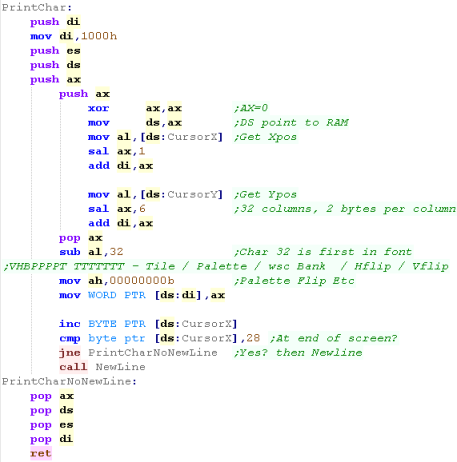
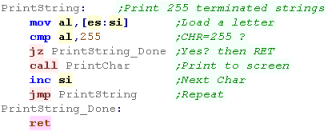
Showing Hello World
Compiling and Running
| these tutorials use UASM
as an assembler, it's free and MASM compatible! We compile it on the command line with the following command:  Defined Symbols... We're defining some symbols on the command line (equivalent of the equ command).. you don't need this for the basic hello world -bin... this tells the assembler we're building an raw binary file. -1... this tells the assembler to use 186 mode. Listing File... we're specify a listing file - it shows the source and resulting bytecode, it's for debugging, so you don't need it, but it helps! Output file... this is the resulting program file Source file... the ASM file we're compiling, in this example %buildFile% will be defined by the batchfile - it would be Hello.asm or something if you're writing your own build script |
|
| We've built a ROM file... we can start it on the command line
with oswan |
 |
| Here is the result |  |
Extending with a Monitor
| In these tutorials we use some software debugging tools, A Monitor which shows the state of the registers, a Debugger which shows some lines of the memory |
 |
| Here is the result |
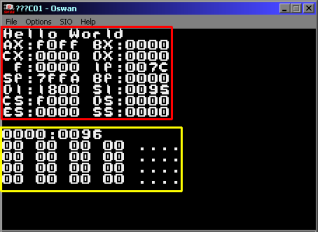 |
Monitor Code
 |
We compiling for
Wonderswan and WonderSwan color - but we're not trying to make
a cartridge that works on both. If we were clever, we could do some kind of 'hardware detection' and switch to different init routines. But it's just for fun!... we're only trying our games on emulators... if you're trying to make a commercial release, maybe you'll need to 'try harder!' |
| We'll need a copy of
MASM611 somewhere... the one we're using here was downloaded
from this
site. |
 |
Unleashing the MASM!
| In this example we'll use the copy of MASM
found here, First we should extract all the folders from our MASM archive into a folder on our Dos C Drive. |
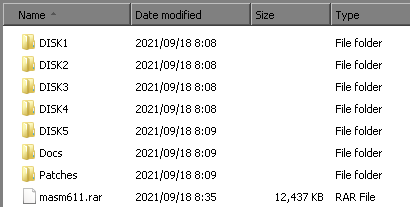 |
| To start the installation we need to go in to the DISK1
folder of the files we just extracted Next we run SETUP.EXE |
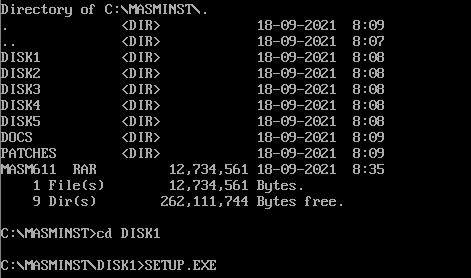 |
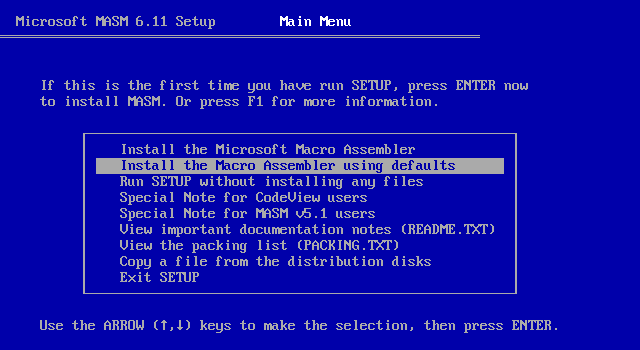
| Install the software 'using defaults' (Option 2) |
 |
| We'll use the MASM 'Programmers WorkBench' to write our program,
but we need to set up the environment variables So lets create a batch file called "PWB.BAT" in C:\MASM611 - either with EDIT in dos if we have it, or NOTEPAD in windows. First we call the batch file 'NEW-VARS.bat' created by the installer. then we run PWB.exe in the BINR folder We can now run PWB to start the programmers editor |
 call binr\NEW-VARS.bat binr\PWB.exe |
Assembling our Program
| We can assemble our program with the EXECUTE
command from the RUN command |
 |
| Rebuild All will assemble our
program |
 |
| Oh Noes! we have errors!... Click View
Results to see what went wrong! |
 |
| We have done a naughty! Lets fix the bugs in our code! |
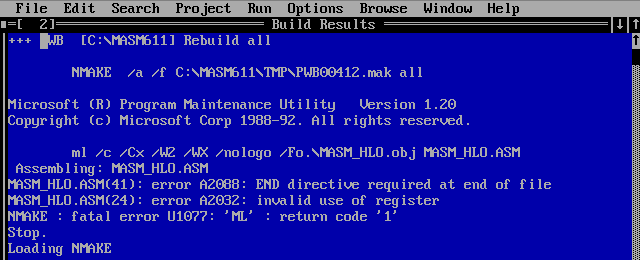 |
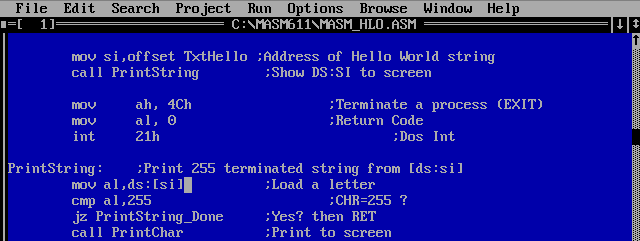
| We need to change [ds:si] to ds:[si]
on line 24 of the old hello world example We also need to add END to the end of our program |
 |
| If we build again we will get 2 warnings... but we don't care
because we like to live dangerously and have no fear! Select Run Program |
 |
| Our program now works fine! Hurrah! |
 |
 |
It
should be noted that using DOS is likely to make things harder
for us programming than our advanced windows 7 machines (or
even sucky windows 10 ones! :-P) So this isn't really the 'easiest' way to write dos programs! |
| View Options |
| Default Dark |
| Simple (Hide this menu) |
| Print Mode (white background) |
| Top Menu |
| ***Main Menu*** |
| Youtube channel |
| Patreon |
| Introduction to Assembly (Basics for absolute beginners) |
| Amazon Affiliate Link |
| AkuSprite Editor |
| ChibiTracker |
| Dec/Bin/Hex/Oct/Ascii Table |
| Alt Tech |
| Archive.org |
| Bitchute |
| Odysee |
| Rumble |
| DailyMotion |
| Please note: I wlll upload more content to these alt platforms based on the views they bring in |
| 68000 Content |
| ***68000 Tutorial List*** |
| Learn 68000 Assembly |
| Hello World Series |
| Platform Specific Series |
| Simple Samples |
| Grime 68000 |
| 68000 Downloads |
| 68000 Cheatsheet |
| Sources.7z |
| DevTools kit |
| 68000 Platforms |
| Amiga 500 |
| Atari ST |
| Neo Geo |
| Sega Genesis / Mega Drive |
| Sinclair QL |
| X68000 (Sharp x68k) |
| 8086 Content |
| Learn 8086 Assembly |
| Platform Specific Series |
| Hello World Series |
| Simple Samples |
| 8086 Downloads |
| 8086 Cheatsheet |
| Sources.7z |
| DevTools kit |
| 8086 Platforms |
| Wonderswan |
| MsDos |
| ARM Content |
| Learn ARM Assembly |
| Learn ARM Thumb Assembly |
| Platform Specific Series |
| Hello World |
| Simple Samples |
| ARM Downloads |
| ARM Cheatsheet |
| Sources.7z |
| DevTools kit |
| ARM Platforms |
| Gameboy Advance |
| Nintendo DS |
| Risc Os |
| Risc-V Content |
| Learn Risc-V Assembly |
| Risc-V Downloads |
| Risc-V Cheatsheet |
| Sources.7z |
| DevTools kit |
| MIPS Content |
| Learn Risc-V Assembly |
| Platform Specific Series |
| Hello World |
| Simple Samples |
| MIPS Downloads |
| MIPS Cheatsheet |
| Sources.7z |
| DevTools kit |
| MIPS Platforms |
| Playstation |
| N64 |
| PDP-11 Content |
| Learn PDP-11 Assembly |
| Platform Specific Series |
| Simple Samples |
| PDP-11 Downloads |
| PDP-11 Cheatsheet |
| Sources.7z |
| DevTools kit |
| PDP-11 Platforms |
| PDP-11 |
| UKNC |
| TMS9900 Content |
| Learn TMS9900 Assembly |
| Platform Specific Series |
| Hello World |
| TMS9900 Downloads |
| TMS9900 Cheatsheet |
| Sources.7z |
| DevTools kit |
| TMS9900 Platforms |
| Ti 99 |
| 6809 Content |
| Learn 6809 Assembly |
| Learn 6309 Assembly |
| Platform Specific Series |
| Hello World Series |
| Simple Samples |
| 6809 Downloads |
| 6809/6309 Cheatsheet |
| Sources.7z |
| DevTools kit |
| 6809 Platforms |
| Dragon 32/Tandy Coco |
| Fujitsu FM7 |
| TRS-80 Coco 3 |
| Vectrex |
| 65816 Content |
| Learn 65816 Assembly |
| Hello World |
| Simple Samples |
| 65816 Downloads |
| 65816 Cheatsheet |
| Sources.7z |
| DevTools kit |
| 65816 Platforms |
| SNES |
| eZ80 Content |
| Learn eZ80 Assembly |
| Platform Specific Series |
| eZ80 Downloads |
| eZ80 Cheatsheet |
| Sources.7z |
| DevTools kit |
| eZ80 Platforms |
| Ti84 PCE |
| IBM370 Content |
| Learn IBM370 Assembly |
| Simple Samples |
| IBM370 Downloads |
| IBM370 Cheatsheet |
| Sources.7z |
| DevTools kit |
| Super-H Content |
| Learn SH2 Assembly |
| Hello World Series |
| Simple Samples |
| SH2 Downloads |
| SH2 Cheatsheet |
| Sources.7z |
| DevTools kit |
| SH2 Platforms |
| 32x |
| Saturn |
| PowerPC Content |
| Learn PowerPC Assembly |
| Hello World Series |
| Simple Samples |
| PowerPC Downloads |
| PowerPC Cheatsheet |
| Sources.7z |
| DevTools kit |
| PowerPC Platforms |
| Gamecube |
| Work in Progress |
| ChibiAndroids |
| Misc bits |
| Ruby programming |
Buy my Assembly programming book
on Amazon in Print or Kindle!


Available worldwide!
Search 'ChibiAkumas' on
your local Amazon website!
Click here for more info!

Buy my Assembly programming book
on Amazon in Print or Kindle!


Available worldwide!
Search 'ChibiAkumas' on
your local Amazon website!
Click here for more info!


Buy my Assembly programming book
on Amazon in Print or Kindle!


Available worldwide!
Search 'ChibiAkumas' on
your local Amazon website!
Click here for more info!


