| Suck Shoot is a 'miniature' version of my larger "Suck Hunt'
game... Gameplay is simple, you have to shoot bats flying towards the screen... the more you shoot, the faster they get! SuckShoot uses the BCD, Range Checking and Random number code covered in the Multiplatform series |
 |
| Here
we're going to take a look at the code which is pretty much
the same on all systems, here we'll look at the GBA, but the
NDS code is also virtually identical! |
 |
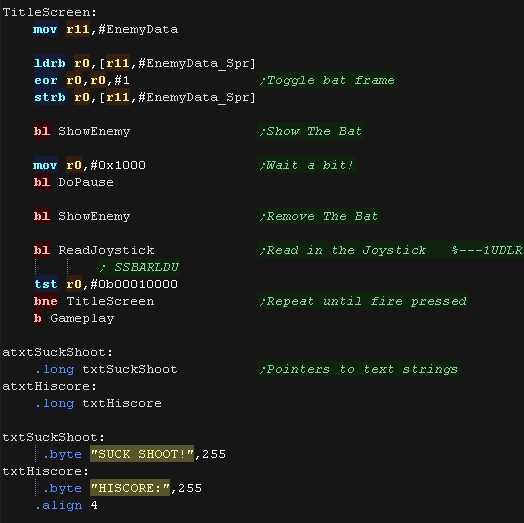
| The Title screen shows the game name, current highscore, and an
animated bat! First we wait for fire to be released, clear the screen, and silence the sound. We then show our text strings for the title and highscore text. Next we show the hiscore itself, using Binary Coded Decimal We need to show our animated bat, we need to position it, and set the scale to 48 to make the bat as big as possible. |
 |
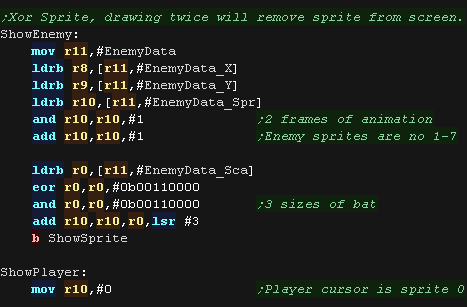
| We need to flip the enemy sprite number between 0/1 to animate
the sprite, we then wait a while, and remove the bat - the sprite is XOR inverted, meaning showing it twice will remove the first. We read from the joystick and loop until fire is pressed. |
 |
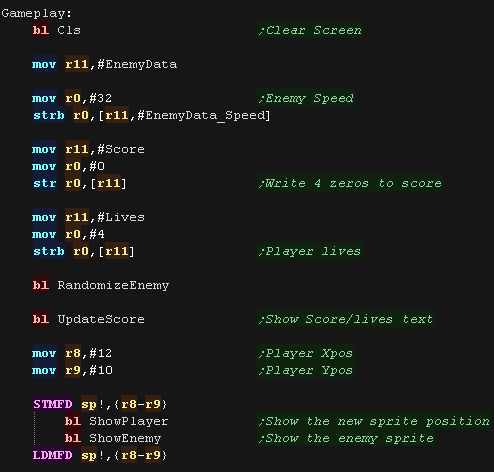
| When the game starts we need to set up the game variables. We zero the score, and set the lives to 4... We randomize the enemy position and show the score and lives to the screen Next we set the Player XY pos in R8,R9 and show the starting position of the player and enemy. |
 |
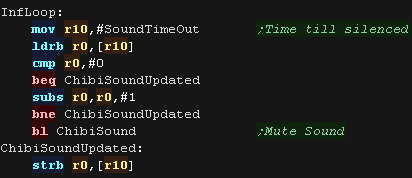
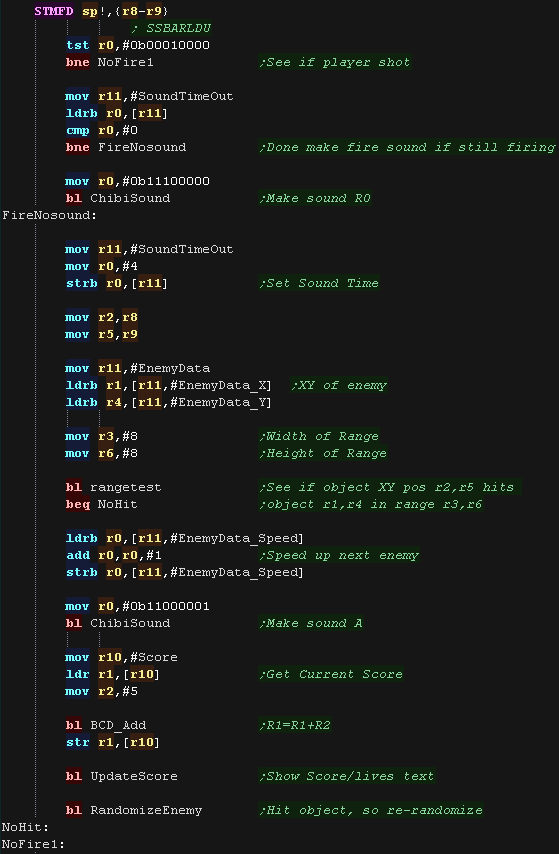
| At the start of the main loop we have the 'sound driver'. We use my 'ChibiSound' driver from the Platform specific series, which takes a single byte parameter and produces tones and FX. This has a 'timeout' after which the tone will be silenced. |
 |
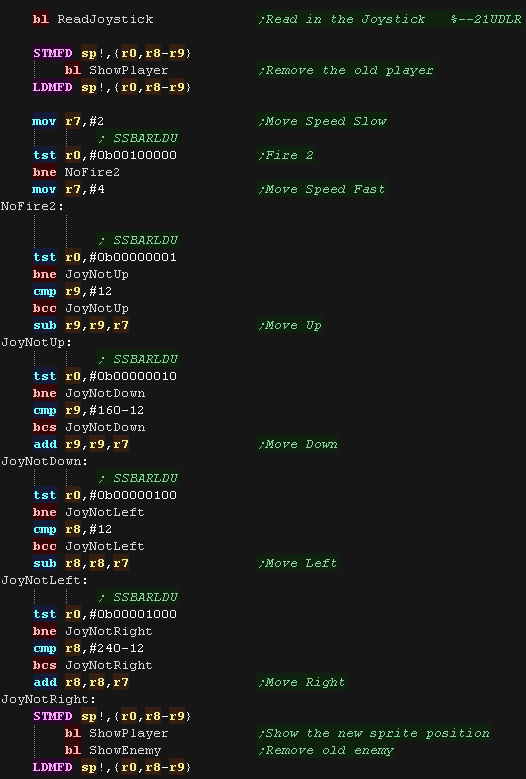
| We need to handle the player movement - this is based on the
simple series. We process each direction and move the player accordingly. Fire 2 can be used to speed up movement! |
 |
| When Fire 1 is pressed we need to shoot. First we make a sound if one isn't already playing. Next we see if the enemy is in range of the crosshair with 'RangeTest' - this was covered in the multiplatform series. If we hit the enemy, the enemy is given a new position, and moved back to the smallest size. We also speed up the enemy for next time. We give the player some score, and make a sound. |
 |
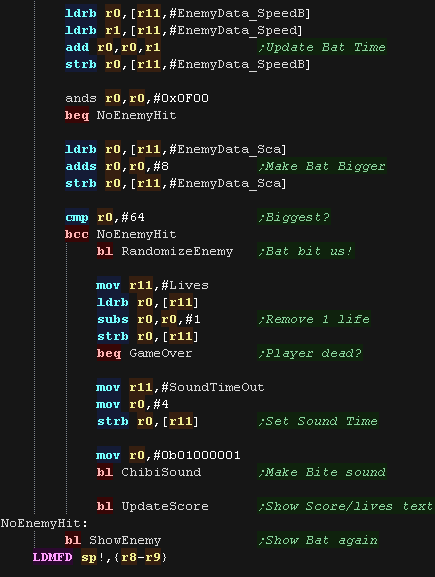
| Next we need to update the enemy First we increase the 'Tick'... and if this goes over 255 we toggle the frame of animation. Next we update the 'speed'... this decides if the bat will move. if it's time for the bat to move we add 8 to the scale - this will make the bat get bigger / closer. If the size has reached 64 then the bat has bitten the player!... in this case we reset the bat, and take one life from the player - if the player has zero lives it's game over! |
 |
| Finally we have a delay, and repeat the main loop. | 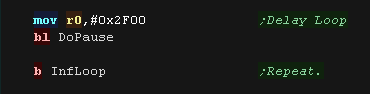 |
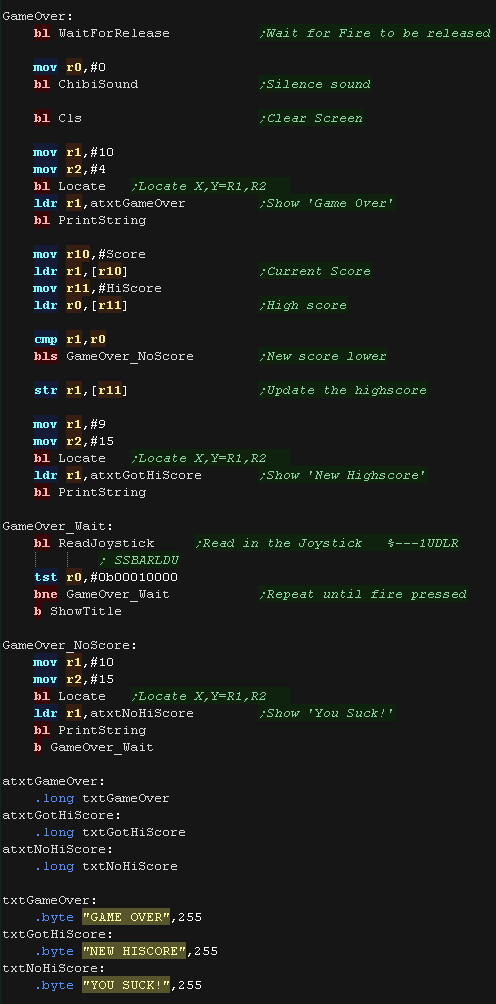
| The Gameover screen clears the screen and shows the 'Game Over'
message. Next we check the score, and compare it to the highscore. If we've got a highscore we show the 'new highscore message', and transfer the score into the highscore. If we didn't we show an insulting message to the player! |
 |
 |
Next
time we'll look at the platform specific code, that is the
sprite drawing routines and joystick routines which are
specific to that system. |
 |
Lesson
SuckShoot2 - SuckShoot GBA Graphics code Lets take a look at the platform specific code on the GBA of SuckShoot! |
 |
 GBA_SuckShoot.asm |
 |
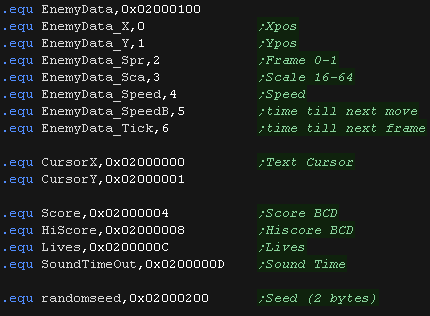
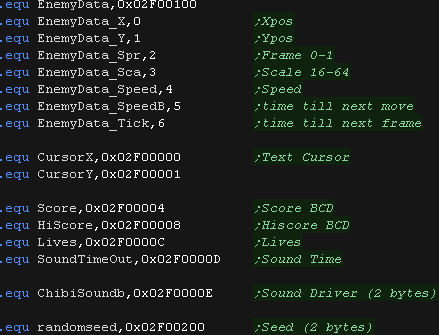
| We need some bytes of RAM for the enemy data, the text cursor
and a few other things. These are defined in the RAM area of the GBA |
 |
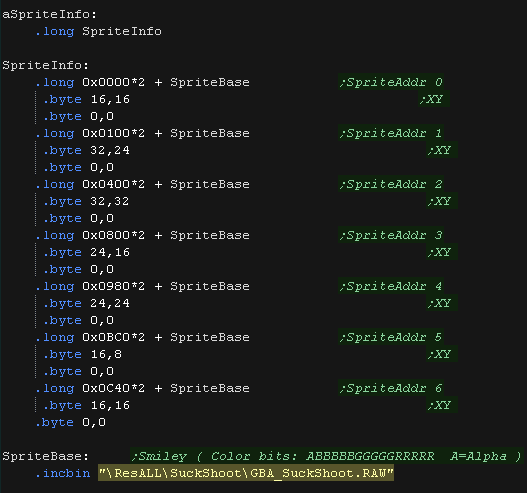
| There are two kinds of data for the sprites. The first is the bitmap data itself in "GBA_Suckshoot.raw" The SpriteInfo table holds 8 bytes per numbered sprite, The first 4 are a pointer to the start of the sprite bitmap in the bitmap data block. The next 2 are the Width and Height of the sprite in pixels. The last 2 are unused, they are just there to space out the block to 8 bytes. |
 |
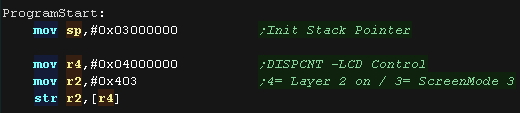
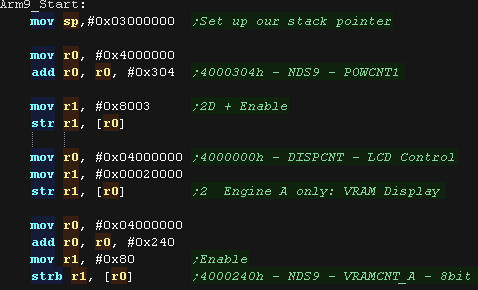
| At the start of our program we turn on the screen. |
 |
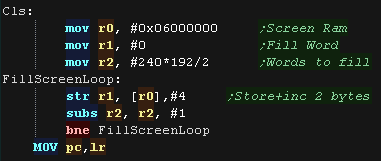
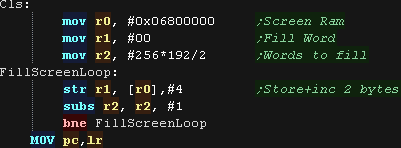
| We have a Clear screen routine to wipe the screen memory |
 |
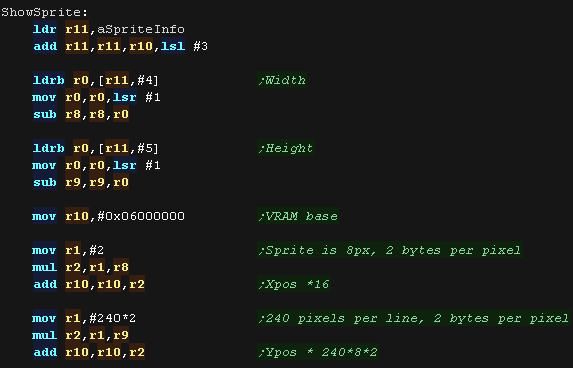
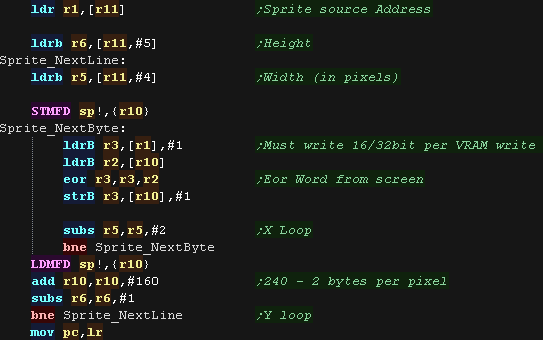
| When we want to show a sprite, we must calculate the offset for
that sprite in the SpriteInfo Table... For the bat sprite, there are 3 scales, and 2 frames per scale. The first sprite is the player crosshair, the next 6 are the bats, so we add 1 to the sprite number to skip the player sprite, and convert the 'scale' to a number 0/2/4 |
 |
| The X,Y position we draw the sprite to is the CENTER of the
sprite (so the range checking works) To facilitate this, we subtract half the width and height of the sprite, effectively centering it. We then calculate the VRAM destination for the sprite. |
 |
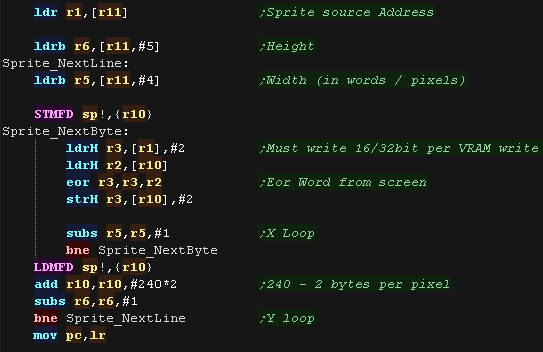
| We transfer all the bytes of the sprite from the source bitmap,
to the VRAM destination. |
 |
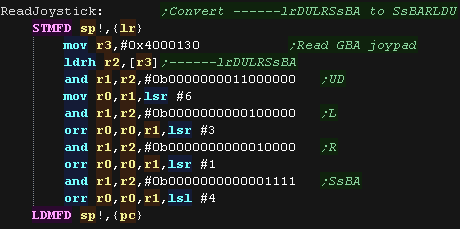
| We read in the joystick directions from 0x4000130. Here we're converting them to a 'common format' I use in my tutorials - 0b4321RLDU. The first 4 bits are the directions Up,Down,Left, Right... The remaining bits are fire buttons and start buttons. |
 |
|
We've got the
game working on the GBA... next time we'll port to the NDS. There isn't actually much difference! we just need to make a few tweaks to our code to get the game running on the NDS |
| This version of the
game is a port of the GBA version! We'll take a look at what needed to change to get the game working on the NDS. |
 |
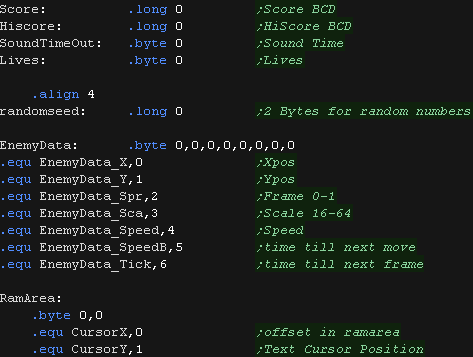
| We need some bytes of RAM for the enemy data, the text cursor
and a few other things. The address we need to use for the the RAM on the NDS is different to the GBA |
 |
| There are two kinds of data for the sprites. The first is the bitmap data itself in "GBA_Suckshoot.raw" The SpriteInfo table holds 8 bytes per numbered sprite, The first 4 are a pointer to the start of the sprite bitmap in the bitmap data block. The next 2 are the Width and Height of the sprite in pixels. The last 2 are unused, they are just there to space out the block to 8 bytes. The sprites are the same as the GBA version |
|
| At the start of our program we turn on the screen. on the NDS we also need to enable the ram and LCD |
 |
| We have a Clear screen routine to wipe the screen memory The address of the VRAM base is different on the NDS |
 |
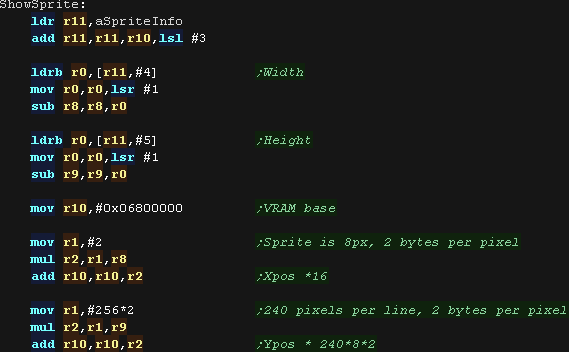
| When we want to show a sprite, we must calculate the offset
for that sprite in the SpriteInfo Table... For the bat sprite, there are 3 scales, and 2 frames per scale. The first sprite is the player crosshair, the next 6 are the bats, so we add 1 to the sprite number to skip the player sprite, and convert the 'scale' to a number 0/2/4 |
|
| The X,Y position we draw the sprite to is the CENTER of the
sprite (so the range checking works) To facilitate this, we subtract half the width and height of the sprite, effectively centering it. We then calculate the VRAM destination for the sprite. The address of the VRAM base, and the size of the screen is different on the NDS |
 |
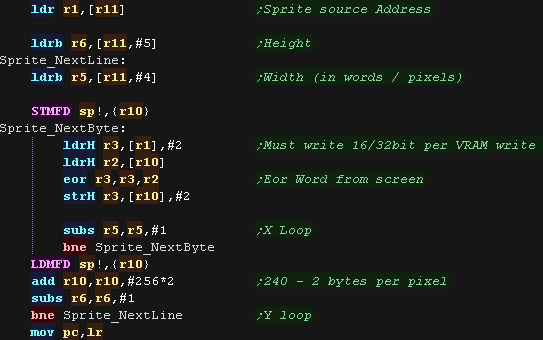
| We transfer all the bytes of the sprite from the source
bitmap, to the VRAM destination. The line size is different on the NDS |
 |
| We read in the joystick directions from 0x4000130. Here we're converting them to a 'common format' I use in my tutorials - 0b4321RLDU. The first 4 bits are the directions Up,Down,Left, Right... The remaining bits are fire buttons and start buttons. This is unchanged on the NDS |
|
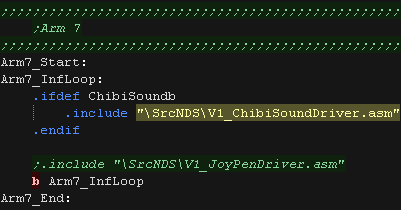
| We're using our ChibiSound driver on the NDS too, but
it has to run from the ARM7 processor on the NDS. This is a bit of a pain, but allows us to get things working. |
 |
|
We've also
had to change our Font drawing routines with new screen base
and screen width... Also the screen width has been updated on
the cursor movement and random enemy routines. |
 |
Lesson
SuckShoot4 - SuckShoot RiscOS Graphics code Lets take a look at the platform specific code on the RISCOS version of SuckShoot! |
|
ROS_SuckShoot.asm |
|
| Unfortunately the RISCOS version does not have sound! This is because the author hasn't written a ChibiSound driver for RiscOS yet because he's a lazy git! |
 |
| We need some bytes of RAM for the enemy data, the text cursor
and a few other things. These are defined at the start of the program. |
 |
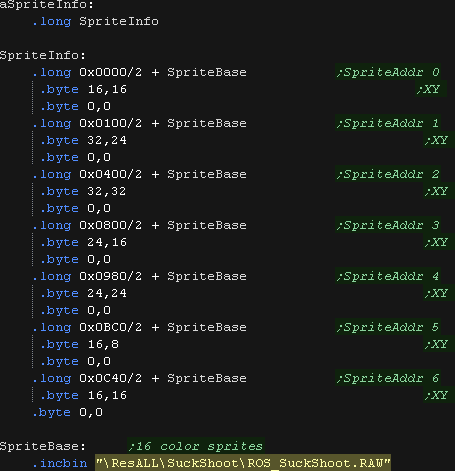
| There are two kinds of data for the sprites. The first is the bitmap data itself in "ROS_Suckshoot.raw"... We're using 16 color mode in Risc OS The SpriteInfo table holds 8 bytes per numbered sprite, The first 4 are a pointer to the start of the sprite bitmap in the bitmap data block. The next 2 are the Width and Height of the sprite in pixels. The last 2 are unused, they are just there to space out the block to 8 bytes. |
 |
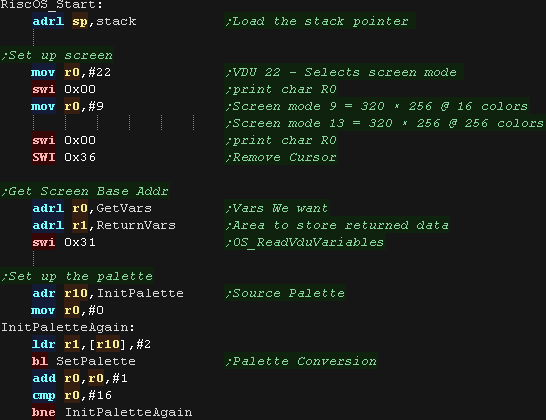
| At the start of our program we turn on the screen and set up our
palette. Please see the simple series bitmap example for more details. |
 |
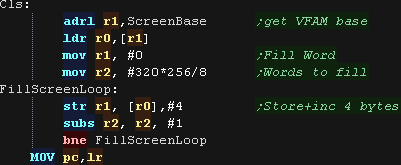
| We have a Clear screen routine to wipe the screen memory |
 |
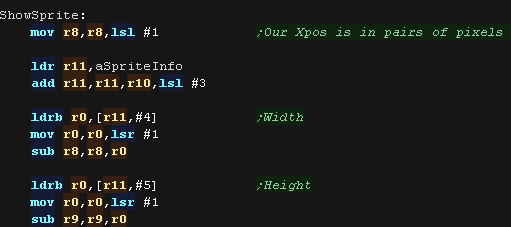
| When we want to show a sprite, we must calculate the offset for
that sprite in the SpriteInfo Table... For the bat sprite, there are 3 scales, and 2 frames per scale. The first sprite is the player crosshair, the next 6 are the bats, so we add 1 to the sprite number to skip the player sprite, and convert the 'scale' to a number 0/2/4 |
|
| The X,Y position we draw the sprite to is the CENTER of the
sprite (so the range checking works) To facilitate this, we subtract half the width and height of the sprite, effectively centering it. We then calculate the VRAM destination for the sprite. |
 |
| We transfer all the bytes of the sprite from the source bitmap,
to the VRAM destination. |
 |
| We don't actually use the joystick on RiscOS, we use the
keyboard, We test UDLR and Space and enter as fire buttons, setting one bit in the returned byte for each direction |
 |
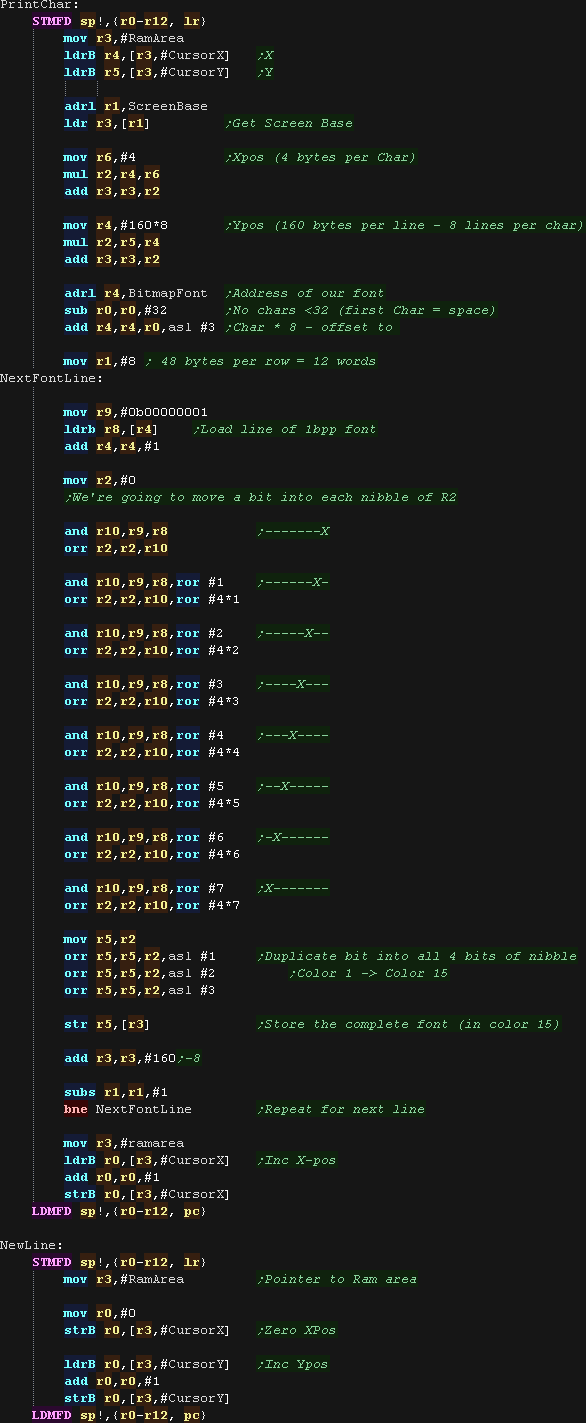
| We need to use a bitmap font to draw text on the screen. In these tutorials we use a 1bpp font on all systems to draw characters to the screen. We calculate the screen destination based on CursorXY pos. Our font has no characters lower than 32, and each character uses 8 bytes, we use this to calculate the offset in the bitmapfont. As we have 8 pixels per line, and we're in 16 color mode, we need to move 8 bits from our font into 4 destination bytes, we use a series of masks and ors to shift the bits into the destination. |
 |
